本文主要记录第一行代码中安卓开发流程总结和个人安卓APP开发中遇到的实战问题解决方案

大纲
Android Studio安装
百度网盘下载Android Studio 2.2版本
Tips:不要去什么安卓中文官网下载3.*版本的AS,原因如下
1.下载的安装包不包括Android SDK
2.下载的3.*版本对于Android SDK的版本要求过高,容易不兼容低版本sdk导致项目Build失败,市场份额最高的安卓sdk版本为15,不需要追求太高的版本
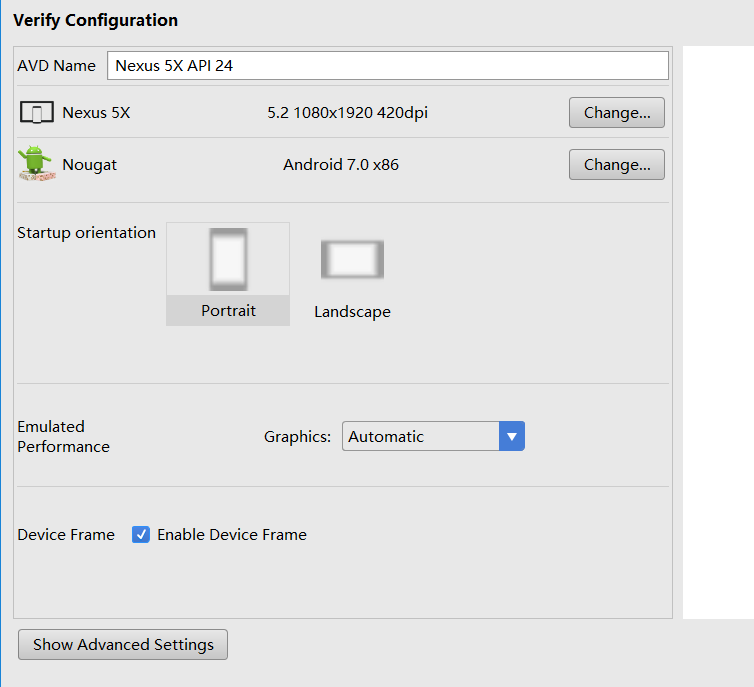
模拟器创建和安装
点击顶部工具栏中的AVD Manager
选择Nexus 5X机型+Nougat Android 7.0操作系统版本+保持默认配置即可
点击Finish即可创建好模拟器,之后点击三角形Start启动模拟器
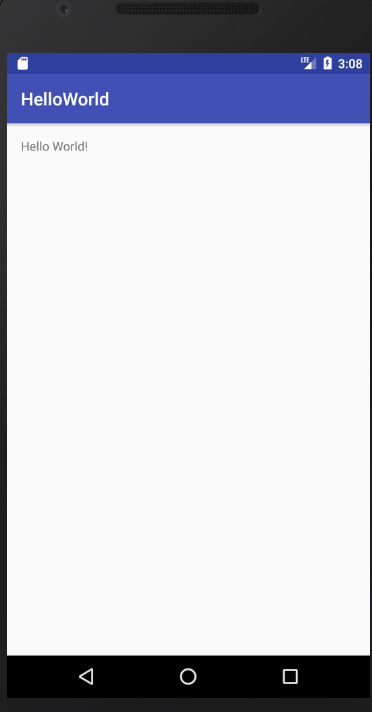
运行Android项目在模拟器上
下面工具栏对应编译项目+选择运行项目+运行项目
点击运行项目选择刚才创建的模拟器即可将选择运行的项目在模拟器上运行
真机调试
1.将手机使用USB连接至PC端后打开USB调试功能(开发者选项)
2.在选择运行项目的app栏中选择Edit Configuration中的Deployment Target Options选项中选择USB Device
3.点击运行项目,若出现Error running app: No target device found.错误,则点击下方的Android Monitor选项卡,会自动帮你识别你的设备,如下
4.此时再运行项目,AS会自动将项目打包成.apk格式安装到你的手机上并自动运行
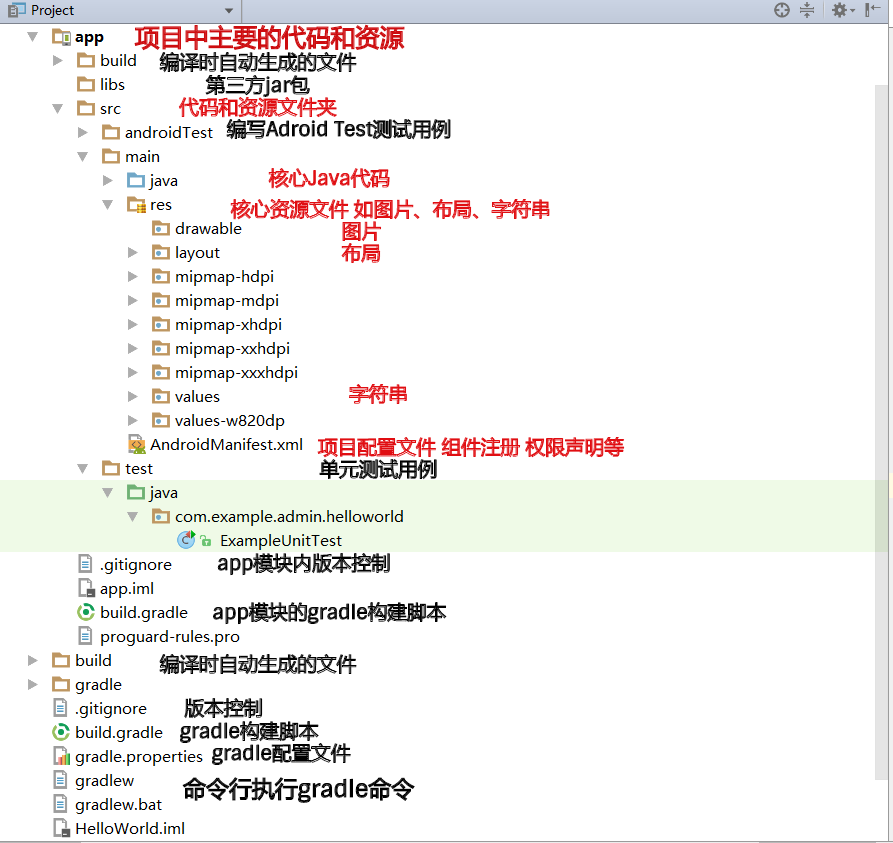
安卓项目结构
重点学习app项目,其他文件了解即可,后期才会学习
安卓项目运行流程
以HelloWorld项目为例
1.在AndroidMainfest.xml中注册HelloWorld活动:1
2
3
4
5
6<activity android:name=".HelloWorld">
<intent-filter>
<action android:name="android.intent.action.MAIN" />
<category android:name="android.intent.category.LAUNCHER" />
</intent-filter>
</activity>
2.在Java文件夹下编写HelloWorld活动代码:继承Activity类(AppCompatActivity为其子类用于向下兼容),重载父类的onCreate方法,setContentView引入布局文件1
2
3
4
5
6
7public class HelloWorld extends AppCompatActivity {
protected void onCreate(Bundle savedInstanceState) {
super.onCreate(savedInstanceState);
setContentView(R.layout.activity_hello_world);
}
}
3.在res/layout中编写布局文件:可以看到布局文件中有个
资源引用
对于res文件夹里面的资源,可以使用两种方式引用,以引用res/values/strings中的字符串为例
代码中R.string|drawable|mipmap.ValueName
布局XML中@string|drawable|mipmap/ValueName
Adnroid Studio的构建脚本
AS采用Gradle来构建项目,Gradle是一个先进的项目构建工具,摈弃了XML的繁琐配置,使用了特定的DSL语言来简洁构建项目
外层项目中的build.gradle:
1.使用了jcenter()配置,是一个代码托管仓库,配置之后就可以引用jcenter的开源项目
2.声明了构建项目类型为安卓项目,通过dependencies闭包中的classpath指定构建项目的Gradle插件1
2
3
4
5
6
7
8
9
10
11
12
13
14
15
16
17buildscript {
repositories {
jcenter()
}
dependencies {
classpath 'com.android.tools.build:gradle:2.2.0'
// NOTE: Do not place your application dependencies here; they belong
// in the individual module build.gradle files
}
}
allprojects {
repositories {
jcenter()
}
}
app模块的build.gradle:
1.apply plugin指定模块类:com.android.application为应用模块,com.android.library为库模块
2.android闭包指定项目构建属性
compileSdkVersion 编译版本
buildToolsVersion 项目构建工具版本
applicationId 项目包名
minSdkVersion 最低兼容安卓系统版本
targetSdkVersion 目标运行安卓版本
versionCode 项目版本号
versionName 项目版本名
3.buildTypes闭包指定生成安装文件配置:包含release闭包指定正式安装文件配置和debug闭包(可省略)指定测试安装文件配置,AS直接运行项目生成的都是测试版安装文件
minifyEnabled 是否代码混淆
proguardFiles 代码混淆规则
4.dependencies闭包指定项目依赖关系:AS项目中有三种依赖关系,本地依赖(本地Jar包或者目录),库依赖(项目中的库模块),远程依赖(jcenter库上的开源项目)
compile fileTree 本地依赖中的一种
com.android.support:appcompat-v7:24.2.1 远程依赖库格式 域名:组名称:版本号1
2
3
4
5
6
7
8
9
10
11
12
13
14
15
16
17
18
19
20
21
22
23
24
25
26
27
28
29apply plugin: 'com.android.application'
android {
compileSdkVersion 24
buildToolsVersion "27.0.3"
defaultConfig {
applicationId "com.example.admin.helloworld"
minSdkVersion 15
targetSdkVersion 24
versionCode 1
versionName "1.0"
testInstrumentationRunner "android.support.test.runner.AndroidJUnitRunner"
}
buildTypes {
release {
minifyEnabled false
proguardFiles getDefaultProguardFile('proguard-android.txt'), 'proguard-rules.pro'
}
}
}
dependencies {
compile fileTree(dir: 'libs', include: ['*.jar'])
androidTestCompile('com.android.support.test.espresso:espresso-core:2.2.2', {
exclude group: 'com.android.support', module: 'support-annotations'
})
compile 'com.android.support:appcompat-v7:24.2.1'
testCompile 'junit:junit:4.12'
}
日志工具
Android的日志工具类是Log(android.util.Log),提供五个级别的方法来打印日志信息
Log.v()——verbose——繁琐意义最小的日志信息
Log.d()——debug——调试信息
Log.i()——info——重要数据如用户行为
Log.w()——warn——警告信息
Log.e()——error——错误信息如catch
在HelloWorld中的onCreate中加入一条log.d(),运行项目后可在Android Monitor中的logcat中看到日志信息